> ## Documentation Index
> Fetch the complete documentation index at: https://docs.apiyi.com/llms.txt
> Use this file to discover all available pages before exploring further.
# Quick Start
> Two ways to integrate APIYI — hand the docs to your AI coding agent and let it do the work, or wire it up yourself in three steps.
New accounts come with **\$0.05** in trial credit, so you can make the first call below without topping up. A lightweight model such as `gpt-5.4-mini` is more than enough to confirm your integration works.
## Two paths, pick one
Copy one prompt into Codex, Claude Code or Cursor. It reads the docs, writes the code and runs it. Best if you already work with a coding agent.
Register, create a key, make your first call. Three steps, five minutes. Best if you want to understand each piece.
**Both paths start the same way**: you register the account and create the key yourself. What an AI can take over is everything after that — picking a model, getting the base URL right, writing the example, and debugging it.
## Let an AI do it
### Send your agent this prompt
Integrate APIYI into this project.
1. First, load the integration knowledge: run `npx skills add https://docs.apiyi.com`
to install the APIYI skill. If that command does not work, just fetch and read
[https://docs.apiyi.com/skill.md](https://docs.apiyi.com/skill.md) in full — same content.
2. For anything more specific, find the page in [https://docs.apiyi.com/llms.txt](https://docs.apiyi.com/llms.txt);
append `.md` to any documentation URL to get a plain Markdown version, which
costs far fewer tokens than scraping the HTML.
3. Ask me for an API key (I will copy it from [https://api.apiyi.com/token](https://api.apiyi.com/token)) and put
it in the `APIYI_API_KEY` environment variable. **Do not hardcode it and do not
commit it to git.**
4. Write a minimal runnable example in this project's existing stack, starting with
the model `gpt-5.4-mini`. Note that the base URL depends on the SDK: the OpenAI
SDK uses `https://api.apiyi.com/v1`, the Anthropic SDK uses the root domain
`https://api.apiyi.com` with no /v1, and the Google GenAI SDK uses the root
domain with api\_version set to v1beta.
5. Actually run it and show me the response. Once it works, tell me what the call
cost and which model you would switch to for real usage.
### What it will do
`https://docs.apiyi.com/skill.md` is an integration reference written for machines: endpoints, authentication, the model-naming rule, known pitfalls and a verification checklist. Reading it gives an agent everything it needs to integrate APIYI.
`llms.txt` is the index of every page on this site. The agent picks the relevant ones and appends `.md` to read them as plain text.
It writes the example in your project's existing language and dependencies rather than copying the Python from the docs. It is not done until the call succeeds.
### Five entry points you can feed to an AI
| Entry point | URL | When to use it |
| - | - | - |
| **Skill** | `https://docs.apiyi.com/skill.md` | Give an agent the complete integration reference in one shot. Start here. |
| **Page index** | `https://docs.apiyi.com/llms.txt` | Let the agent decide which page it needs |
| **Single page as text** | Append `.md` to any documentation URL | When you only care about one page — cheaper than the HTML |
| **MCP server** | `https://docs.apiyi.com/mcp` | Connect this documentation site as an MCP server so your agent can search it live |
| **Model registry** | `https://docs.apiyi.com/model-registry.json` | Machine-readable model IDs, endpoints, groups and list prices, so the agent stops guessing |
The skill, the CLI and the contract-plus-registry path for coding agents are all described in the [AI Developer Kit](/en/developer-kit).
The plain-text version of this page, for example, is `https://docs.apiyi.com/en/getting-started.md`. Every page on the site supports the suffix.
### Send any page straight to an AI
Every documentation page has a **Copy page** button in the top right. Opening the arrow next to it reveals more options:
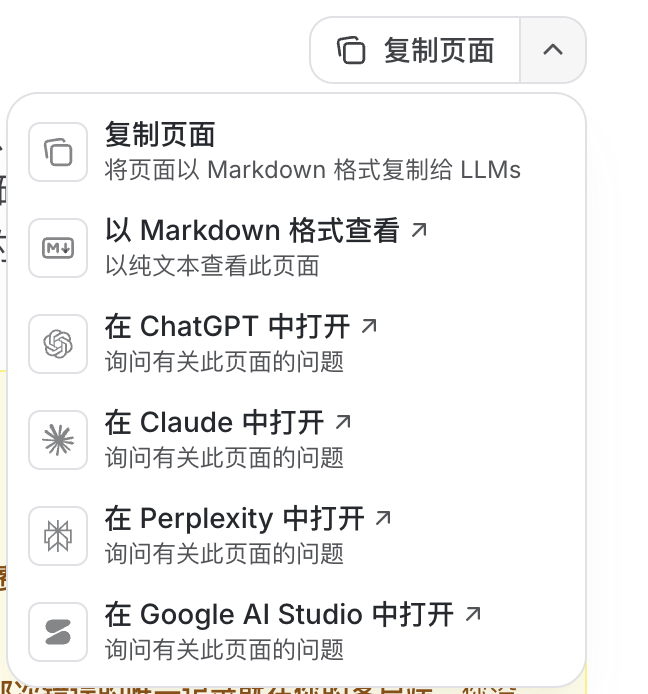 | Option | What it does |
| - | - |
| **Copy page** | Copies the current page as Markdown to your clipboard, ready to paste into any AI |
| **View as Markdown** | Opens the plain-text version in the browser — handy for checking or sharing a link |
| **Open in ChatGPT** | Jumps to ChatGPT carrying this page as context |
| **Open in Claude** | Same, for Claude |
| **Open in Perplexity** | Same, for Perplexity |
| **Open in Google AI Studio** | Same, for Google AI Studio |
When you hit a problem with a specific model, the fastest route is to open that model's page, hit **Copy page**, and send it to an AI along with your error.
## Do it yourself
### Step 1: Register and get a key
Go to the [APIYI website](https://api.apiyi.com), register with email and verify it (a university or corporate address is recommended), then sign in to the console.
Open the [token page](https://api.apiyi.com/token):
1. You can copy the **default token** and use it directly (copy icon on the right)
2. Or click **New** in the top right to create one, name it (for example `test-key`), and confirm
Keys start with `sk-`. See [How to create a key](/en/faq/token-management) for details.
Once the \$0.05 trial credit runs out, top up from the console. Minimum amounts and settlement rules differ by payment channel — see [Payment Methods](/en/faq/payment-methods) — and bonus policy is covered in [Recharge Promotions](/en/faq/recharge-promotions).
### Step 2: Get the connection details right
**Choose the base URL by SDK, not by model.** This is the most common integration mistake:
| Your SDK | Base URL | Why |
| - | - | - |
| OpenAI SDK (and most clients) | `https://api.apiyi.com/v1` | The SDK appends `/chat/completions` itself, so `/v1` must be there |
| Anthropic SDK (Claude native) | `https://api.apiyi.com` | The SDK appends `/v1/messages` itself — **adding `/v1` produces `/v1/v1/messages` and a 404** |
| Google GenAI SDK (Gemini native) | `https://api.apiyi.com` | Also set `api_version: "v1beta"` |
Do **not** leave a trailing slash on `base_url` — it produces doubled slashes and a 404. Full details and node selection are in [Base URL configuration](/en/faq/base-url-config).
### Step 3: Make your first call
```bash theme={null}
curl https://api.apiyi.com/v1/chat/completions \
-H "Content-Type: application/json" \
-H "Authorization: Bearer $APIYI_API_KEY" \
-d '{
"model": "gpt-5.4-mini",
"messages": [{"role": "user", "content": "Hello!"}]
}'
```
```python theme={null}
import os
from openai import OpenAI
client = OpenAI(
api_key=os.environ["APIYI_API_KEY"],
base_url="https://api.apiyi.com/v1"
)
response = client.chat.completions.create(
model="gpt-5.4-mini",
messages=[
{"role": "user", "content": "Hello!"}
]
)
print(response.choices[0].message.content)
```
```javascript theme={null}
import OpenAI from 'openai';
const openai = new OpenAI({
apiKey: process.env.APIYI_API_KEY,
baseURL: 'https://api.apiyi.com/v1'
});
const response = await openai.chat.completions.create({
model: 'gpt-5.4-mini',
messages: [{ role: 'user', content: 'Hello!' }]
});
console.log(response.choices[0].message.content);
```
```java theme={null}
// Using the official OpenAI Java library
OpenAiService service = new OpenAiService(
System.getenv("APIYI_API_KEY"),
Duration.ofSeconds(60),
"https://api.apiyi.com/v1"
);
ChatCompletionRequest request = ChatCompletionRequest.builder()
.model("gpt-5.4-mini")
.messages(List.of(
new ChatMessage(ChatMessageRole.USER, "Hello!")
))
.build();
ChatCompletionResult result = service.createChatCompletion(request);
System.out.println(result.getChoices().get(0).getMessage().getContent());
```
The `gpt-5` series and above have three parameter restrictions: `temperature` must be 1, use `max_completion_tokens` instead of `max_tokens`, and do not send `top_p`.
## Next steps
Set `ANTHROPIC_BASE_URL` and drive Claude Code through APIYI
One `config.toml` covers the desktop app, the IDE plugin and the CLI
Every supported model and a capability cheat sheet
Full endpoint reference, error codes and debugging
## FAQ
### How do I switch models?
Just change the `model` parameter in your request:
```json theme={null}
{
"model": "gpt-5.6-sol", // Use GPT-5.6 Sol
"model": "claude-opus-5", // Use Claude Opus 5
"model": "gemini-3.6-flash" // Use Gemini 3.6 Flash
}
```
**Model IDs use dots, not hyphens.** The hyphens in documentation URLs are a URL-safety substitution; the real model ID keeps its dots. The page `/models/qwen3-7-max` corresponds to the model ID `qwen3.7-max`. Writing `gpt-5-4-mini` returns a 404 — the correct form is `gpt-5.4-mini`.
When in doubt, list them: `GET https://api.apiyi.com/v1/models`.
### Which programming languages are supported?
APIYI is compatible with OpenAI API standards and supports all languages that OpenAI SDKs support:
* Python
* JavaScript/TypeScript
* Java
* C#/.NET
* Go
* Ruby
* PHP
* And more...
### How do I check my balance?
Sign in to the [console](https://api.apiyi.com/account/profile) to view:
* Account balance
* Usage history
* Consumption statistics
You can also query programmatically via API:
* [Balance Query API](/en/api-capabilities/balance-query): Get account balance, expiry date, and more via API
* [Balance Alert Setup](/en/faq/balance-alerts): Auto-notify on low balance to avoid service interruption
### What if I run into a problem?
1. Open the page that is giving you trouble, hit **Copy page** in the top right, and send it to an AI together with your error
2. Check the [API manual](/en/api-manual)
3. Review [common errors](/en/faq/invalid-api-key)
4. Contact support: [support@apiyi.com](mailto:support@apiyi.com)
Tip: Save your API key securely and regularly check usage logs in the console. Every request has message history for cost optimization.
Happy using!
This documentation is built and hosted on [Mintlify](https://mintlify.com), a developer documentation platform.
| Option | What it does |
| - | - |
| **Copy page** | Copies the current page as Markdown to your clipboard, ready to paste into any AI |
| **View as Markdown** | Opens the plain-text version in the browser — handy for checking or sharing a link |
| **Open in ChatGPT** | Jumps to ChatGPT carrying this page as context |
| **Open in Claude** | Same, for Claude |
| **Open in Perplexity** | Same, for Perplexity |
| **Open in Google AI Studio** | Same, for Google AI Studio |
When you hit a problem with a specific model, the fastest route is to open that model's page, hit **Copy page**, and send it to an AI along with your error.
## Do it yourself
### Step 1: Register and get a key
Go to the [APIYI website](https://api.apiyi.com), register with email and verify it (a university or corporate address is recommended), then sign in to the console.
Open the [token page](https://api.apiyi.com/token):
1. You can copy the **default token** and use it directly (copy icon on the right)
2. Or click **New** in the top right to create one, name it (for example `test-key`), and confirm
Keys start with `sk-`. See [How to create a key](/en/faq/token-management) for details.
Once the \$0.05 trial credit runs out, top up from the console. Minimum amounts and settlement rules differ by payment channel — see [Payment Methods](/en/faq/payment-methods) — and bonus policy is covered in [Recharge Promotions](/en/faq/recharge-promotions).
### Step 2: Get the connection details right
**Choose the base URL by SDK, not by model.** This is the most common integration mistake:
| Your SDK | Base URL | Why |
| - | - | - |
| OpenAI SDK (and most clients) | `https://api.apiyi.com/v1` | The SDK appends `/chat/completions` itself, so `/v1` must be there |
| Anthropic SDK (Claude native) | `https://api.apiyi.com` | The SDK appends `/v1/messages` itself — **adding `/v1` produces `/v1/v1/messages` and a 404** |
| Google GenAI SDK (Gemini native) | `https://api.apiyi.com` | Also set `api_version: "v1beta"` |
Do **not** leave a trailing slash on `base_url` — it produces doubled slashes and a 404. Full details and node selection are in [Base URL configuration](/en/faq/base-url-config).
### Step 3: Make your first call
```bash theme={null}
curl https://api.apiyi.com/v1/chat/completions \
-H "Content-Type: application/json" \
-H "Authorization: Bearer $APIYI_API_KEY" \
-d '{
"model": "gpt-5.4-mini",
"messages": [{"role": "user", "content": "Hello!"}]
}'
```
```python theme={null}
import os
from openai import OpenAI
client = OpenAI(
api_key=os.environ["APIYI_API_KEY"],
base_url="https://api.apiyi.com/v1"
)
response = client.chat.completions.create(
model="gpt-5.4-mini",
messages=[
{"role": "user", "content": "Hello!"}
]
)
print(response.choices[0].message.content)
```
```javascript theme={null}
import OpenAI from 'openai';
const openai = new OpenAI({
apiKey: process.env.APIYI_API_KEY,
baseURL: 'https://api.apiyi.com/v1'
});
const response = await openai.chat.completions.create({
model: 'gpt-5.4-mini',
messages: [{ role: 'user', content: 'Hello!' }]
});
console.log(response.choices[0].message.content);
```
```java theme={null}
// Using the official OpenAI Java library
OpenAiService service = new OpenAiService(
System.getenv("APIYI_API_KEY"),
Duration.ofSeconds(60),
"https://api.apiyi.com/v1"
);
ChatCompletionRequest request = ChatCompletionRequest.builder()
.model("gpt-5.4-mini")
.messages(List.of(
new ChatMessage(ChatMessageRole.USER, "Hello!")
))
.build();
ChatCompletionResult result = service.createChatCompletion(request);
System.out.println(result.getChoices().get(0).getMessage().getContent());
```
The `gpt-5` series and above have three parameter restrictions: `temperature` must be 1, use `max_completion_tokens` instead of `max_tokens`, and do not send `top_p`.
## Next steps
Set `ANTHROPIC_BASE_URL` and drive Claude Code through APIYI
One `config.toml` covers the desktop app, the IDE plugin and the CLI
Every supported model and a capability cheat sheet
Full endpoint reference, error codes and debugging
## FAQ
### How do I switch models?
Just change the `model` parameter in your request:
```json theme={null}
{
"model": "gpt-5.6-sol", // Use GPT-5.6 Sol
"model": "claude-opus-5", // Use Claude Opus 5
"model": "gemini-3.6-flash" // Use Gemini 3.6 Flash
}
```
**Model IDs use dots, not hyphens.** The hyphens in documentation URLs are a URL-safety substitution; the real model ID keeps its dots. The page `/models/qwen3-7-max` corresponds to the model ID `qwen3.7-max`. Writing `gpt-5-4-mini` returns a 404 — the correct form is `gpt-5.4-mini`.
When in doubt, list them: `GET https://api.apiyi.com/v1/models`.
### Which programming languages are supported?
APIYI is compatible with OpenAI API standards and supports all languages that OpenAI SDKs support:
* Python
* JavaScript/TypeScript
* Java
* C#/.NET
* Go
* Ruby
* PHP
* And more...
### How do I check my balance?
Sign in to the [console](https://api.apiyi.com/account/profile) to view:
* Account balance
* Usage history
* Consumption statistics
You can also query programmatically via API:
* [Balance Query API](/en/api-capabilities/balance-query): Get account balance, expiry date, and more via API
* [Balance Alert Setup](/en/faq/balance-alerts): Auto-notify on low balance to avoid service interruption
### What if I run into a problem?
1. Open the page that is giving you trouble, hit **Copy page** in the top right, and send it to an AI together with your error
2. Check the [API manual](/en/api-manual)
3. Review [common errors](/en/faq/invalid-api-key)
4. Contact support: [support@apiyi.com](mailto:support@apiyi.com)
Tip: Save your API key securely and regularly check usage logs in the console. Every request has message history for cost optimization.
Happy using!
This documentation is built and hosted on [Mintlify](https://mintlify.com), a developer documentation platform.